Table of Contents
The Photoshop™ Re-Import feature enables the user to re-import a new or revised PSD file to replace existing images in a project's image directory. The re-import wizard is initiated from the main menu » File » Import
In the import dialog that appears, select the source PSD file to re-import and the destination Storyboard application where the new PSD image content will be placed. Then choose Next.
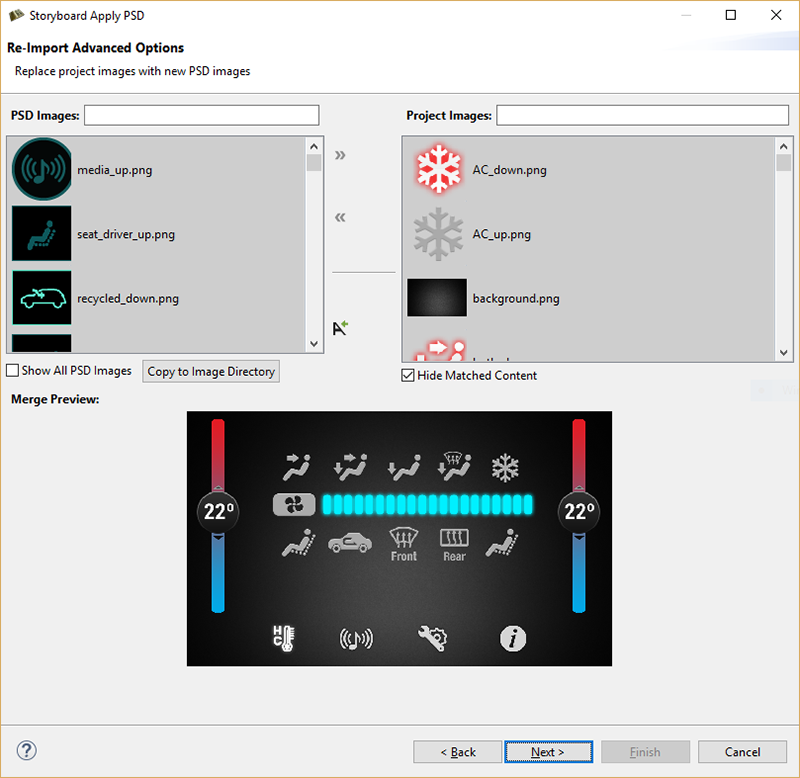
On the left of the dialog window is a list of image content from the PSD file. On the right is the content of the project’s image directory. Selecting any PSD image will show candidate image match content from the PSD file. By clicking the “move right” arrow the selected PSD image is adopted as the new project image and replaces the model selection.
Below the separator in between the two viewers is the 'Match All Images' button. This will go through and automatically map any unique images of the same name. The name and extension must be identical for images to be mapped. If there is more than one identical match, the image won't be mapped.
Matching and unmatching can be undone and redone by using the common keyboard shortcuts 'CTRL-Z' and 'CTRL-R'. If a PSD image does not have a project image with the same name it can still be added to the project image directory by clicking Copy to Image Directory button. Content that is being replaced will be shown in a preview below.

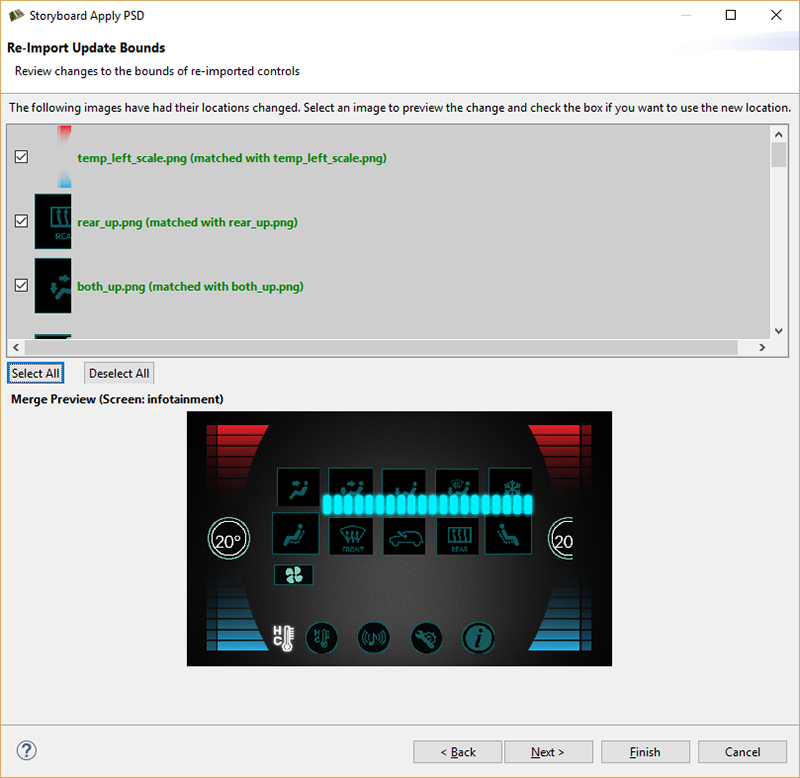
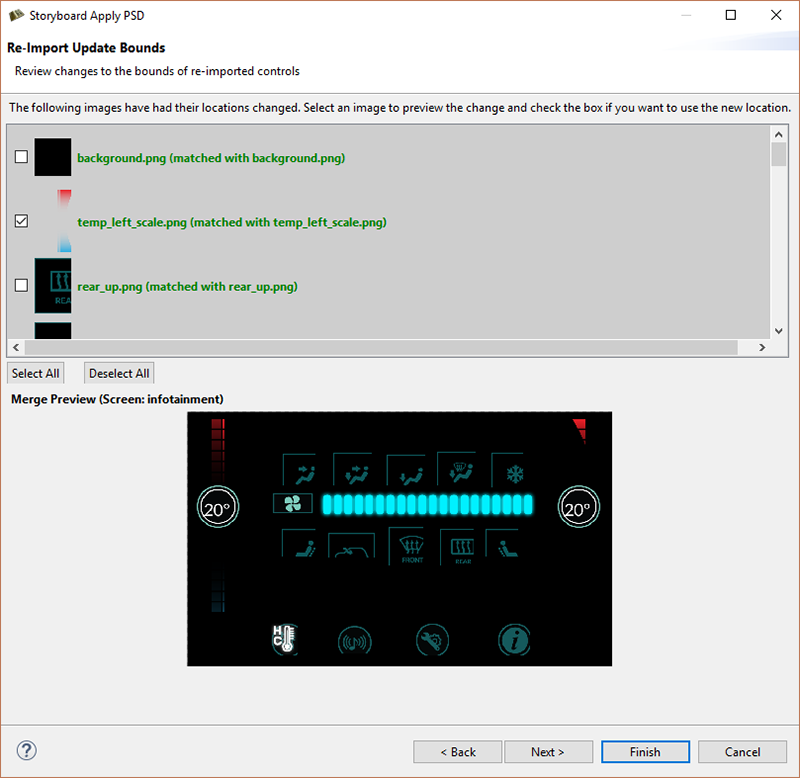
Choosing 'Next' brings you to a page that allows the user to update the bounds of any of the selected matches from the previous page. Any matches from the previous page that have changed location in the re-imported PSD file will appear in the list at the top. Selecting an item from this list shows the location change in the preview at the bottom, similar to the previous page. If you want to use the new location, check the box beside the match before hitting 'Finish'.

After updating the bounds, the next page allows the user to review any new images that have been added in the re-import. An image is considered new if it has no identical match in the current model, and it hasn't been mapped to anything in the first page. Selecting an item will preview it in the thumbnail below, similar to the previous page, and checking it will import the new control into the model.

After choosing to replace, copy or add at least one image, clicking the Finish button will show a prompt that gives the option to overwrite image files that are being updated or keep a copy of the older images that are being replaced. The Photoshop PSD Re-Import feature is meant to update existing content using consistent naming. Using the Import Photoshop PSD File is better for adding new content to an existing project.