Storyboard Designer offers many features to assist with the efficient development of your embedded user interface. Some of these features improve performance by reducing potential runtime inefficiencies while other features speed the development of the application by providing greater insight into an existing design or allowing multiple designers to work in parallel on the application's user interface.
The Design Notes export wizard is used to generate an HTML or PDF report of the storyboard project.
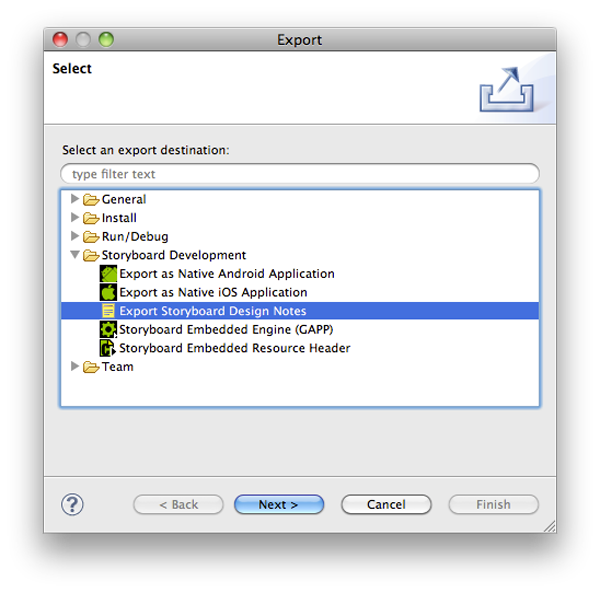
The Design Note export can be accessed from the File > Export > Storyboard Design Notes menu selection or by right clicking on a Storyboard GDE file and selecting Export Storyboard Design Notes. This will open a dialog allowing the user to select the filesystem location for the design report and the format, HTML or PDF, that the design report should be exported to.
The contain information about each of the screens that are present in the application, the layer contents of those screens, the variables present in the application and the model elements to which they are associated. As much as it is possible to infer, a screen flow diagram is also created indicating which events trigger screen transitions.
It also possible to generate headless Design Note exports from the Storyboard Design files that can be used from a command line or scripting environment.
PATH_TO_INSTALL/Storyboard_Designer/storyboard/Storyboard -application
com.crank.gdt.designreport.designreport model=PATH_TO_GDE_MODEL format=[pdf|html]
output=PATH_TO_OUTPUT_FILE
Where
the model is the full path to the Storyboard Designer model
file and the output paramenter specifies the filesystem path
where the report and associated resources will be created. The
format parameter can be set to either html or
pdf to indicate HTML or PDF outputs respectively.
The GoTo dialog provides a quick way to locate and navigate to items in the application design. The GoTo dialog is activated when the CTRL+1 (Windows/Linux) or COMMAND+1 (Mac) keys are pressed while working in the main editor
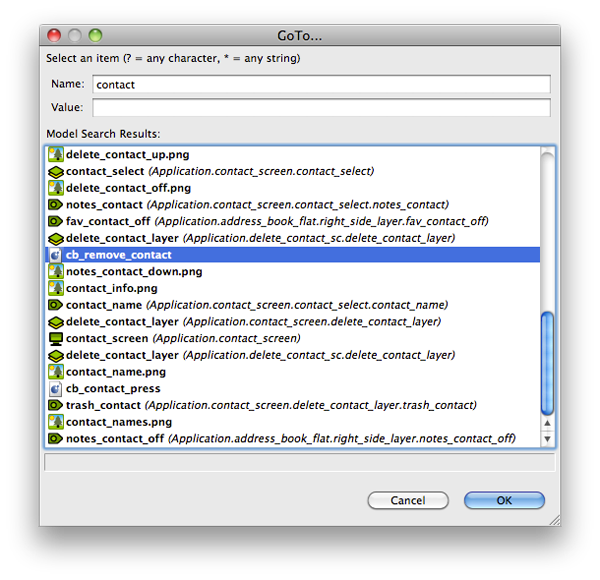
The Name and Value entries allow you to narrow the search criteria for the object you wish to find. The text entered here will filter the results in the list to only display search results matching what you have typed:
- Name
This selection will cause the search to be limited to the primary name of the objects being searched. The name field also searches the name attributes of render extension and action attributes.
- Value
This selection will cause the search to be limited to the value field of actions or render extensions being searched.
Storyboard Search provides an extension of the Go To functionality. Rather than providing the ability to see and navigate to a single selection, the results of a search are displayed in a tree format.
Searching can be done by invoking the Search dialog via the Search menu item or the CTRL+H key command. This will open up the search criteria dialog
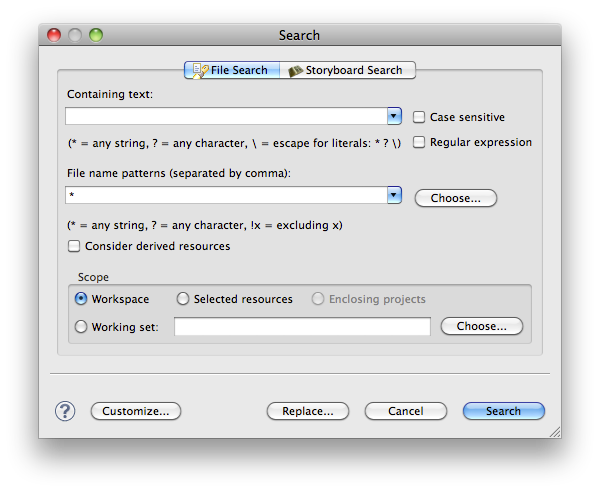
Similar to the GoTo dialog, the Name and Value search criteria allow model object names to be searched or in the case of actions and render extension arguments and variables also their values.
The search results will be displayed hierarchically in the Search view:
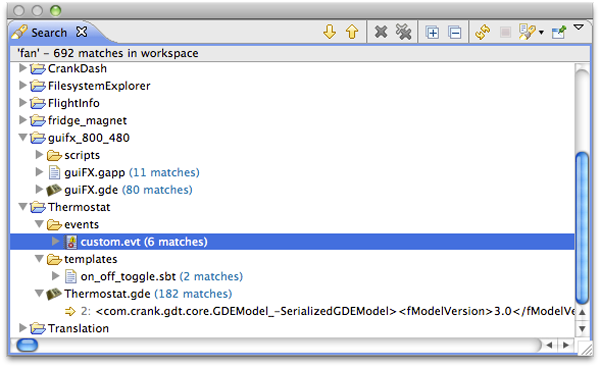
Where applicable, double clicking the results will cause the appropriate model element to be selected and brought forward in the main Storyboard editor.
The Resize Storyboard Application dialog is used create a new Storyboard Designer model file, with different screen width and height settings, based on an existing model file.
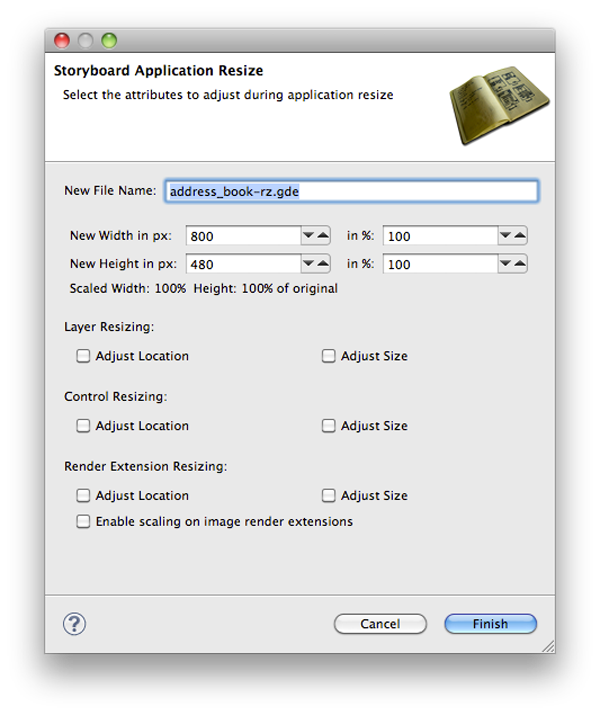
The application resize action dialog allows a Storyboard Designer model file to resize its screen dimensions. Since all of the layers, controls and render extensions in a model are placed at specific locations within the model, the resize operation provides several parameters to allow the layers, controls and rendr extensions to be either re-positioned or re-scaled as appropriate.
The output of the resize action is a new model file located in the same filesystem location as the source model file. Creating this new scaled model file next to the original model file allows the designer to validate and inspect the scaled result before deciding to replace the original file.
The Resource Clean Up wizard can be run from within the Images view or by selecting the model file in the Navigator view and selecting Resource Clean Up... from the menu.
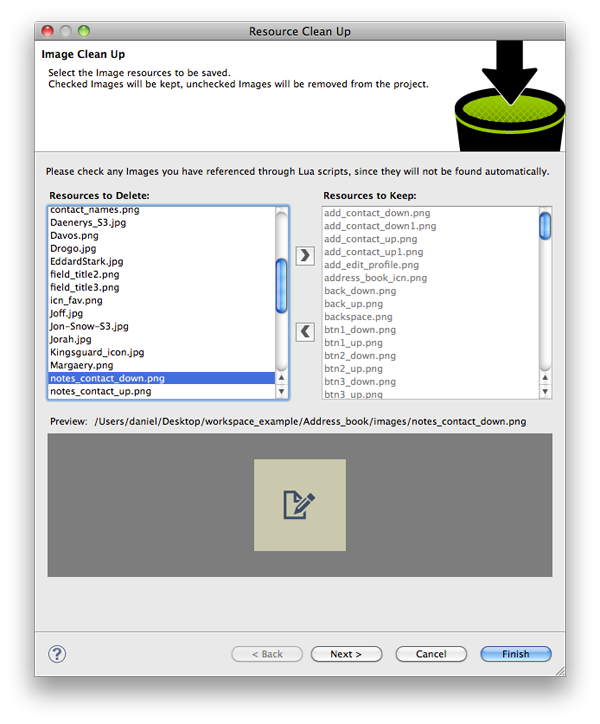
The Resource Clean Up wizard is used to remove resources that are present in the workspace but are no longer referenced by the project. In the wizard, the list on the left side contains the resources (fonts, images) and is used to select the resources that should be maintained/kept in the project. All resources that are not selected will be permanently removed from the project and filesystem. The preview on the right side contains a preview of the selected resource and the filesystem location of that resource.
This tool can only detect those resources that are directly referenced by the project. It is important that resources that are referenced from external programs or scripts be manually checked so as to prevent their removal from the project.
Once all of the resources to remove have been identified, selecting OK will perform the permanent removal of those files from the filesystem.
The Consolidate Images Wizard can be launched from the toolbar in the Images view.
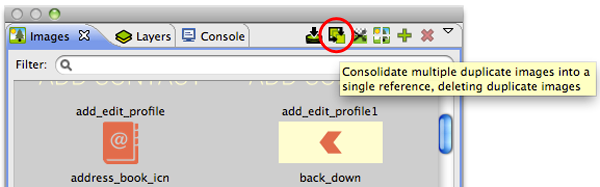
Launching the Consolidate Images wizard will start an analysis of all of the images in the workspace. These images are compared byte by byte to determine if their content is identical and can safely be consolidated together into a single reference.
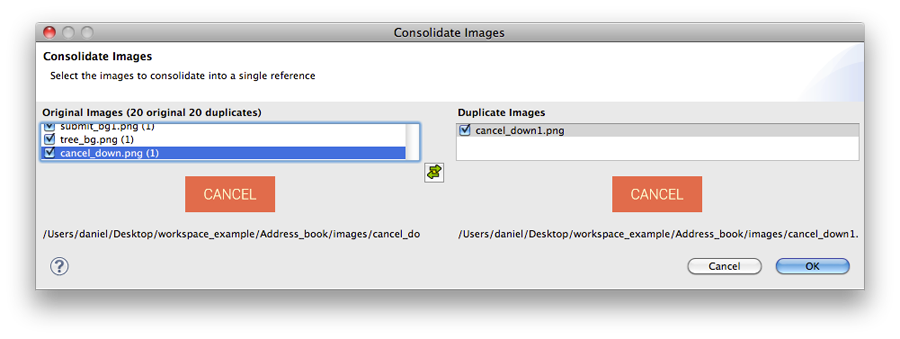
Once the analysis is completed, a dialog will present the results showing the duplicate images that have been detected and allowing a visual comparison of the source and reference images to ensure that they are indeed different.
By default all duplicates will be consolidated into a single reference. To remove a reference from being consolitated, uncheck the item.
Selecting OK will search the model and consolidate variable and argument references to unify their references.
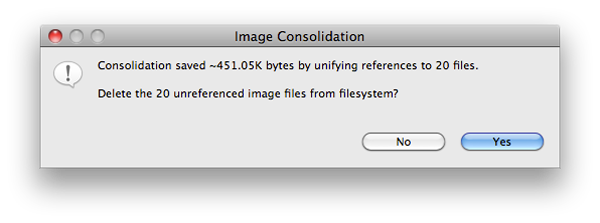
After all of the references have been combined there are likely to be a number of images that are no longer used. These can be immediately deleted from the workspace at this point.
The Trim Images Wizard can be launched from the toolbar in the Images view.
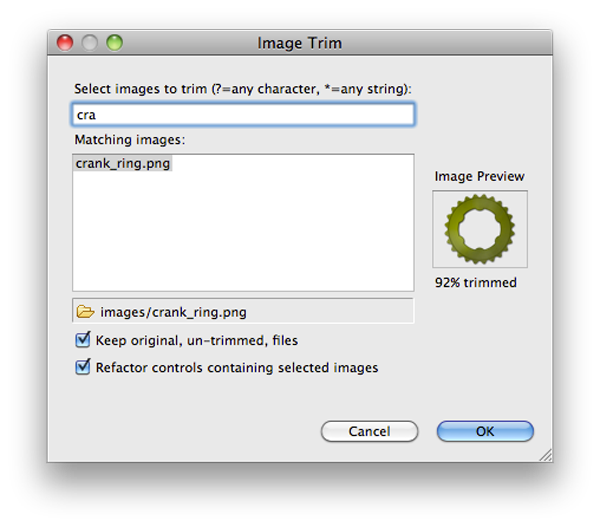
Launching the Image Trim wizard starts an analyss of either all (no selection made) or just the selected images from the Image view. It scans the image looking for transparent pixels on the borders of the image, in order to shrink the image to it's smallest possible size.
The Wizard displays the selected images (or all images, if no selection) that have any pixels to be trimmed. The image preview shows the candidate image, and provides information on how much of the image will get trimmed. By default, the wizard will make copies of the original, un-trimmed files and keep them in your filesystem. If you would like to delete the original un-trimmed files, simply unselect the appropriate checkbox.
The wizard will also refactor all controls containing this image, while maintaining the proper control size and the position of the image within each control.
The Split Images Wizard can be launched from the toolbar in the Images view.
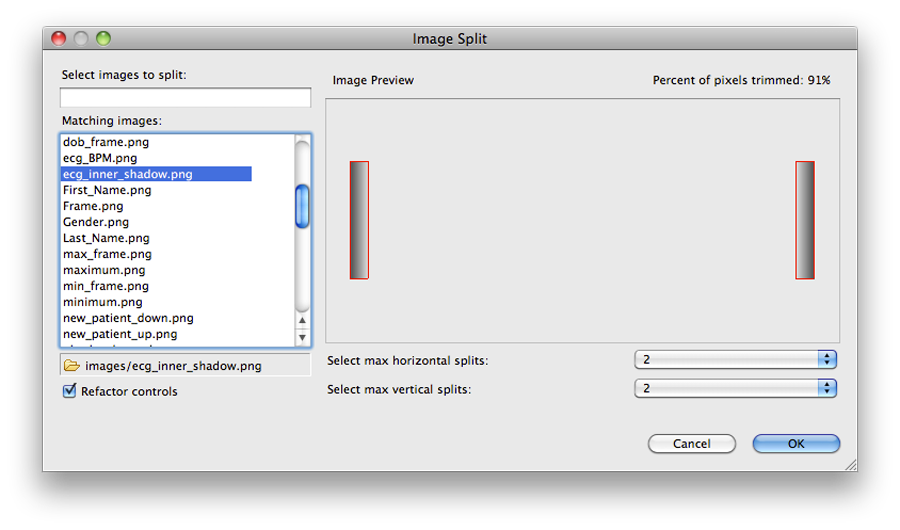
Launching the Image Split wizard starts an analysis of either all (no selection made) or just the selected images from the Image view. It scans the image once, looking for transparent pixels and calculates how the image should be split to get rid of the maximum amount of transparent pixels.
The preview displays a red outline of exactly how the image will be split, and will update according to how many horziontal and vertical splits you specify. The percent of pixels eliminated is displayed in the top right corner.
When you select OK in the dialog the image split operation will proceed on those images you have selected. After splitting the images, all references in your app to the previous image will be refactored such that the controls containing those images will be replaced with the new split images positioned appropriately.
If you would like to leave the controls as they are and not perform the refactoring, simply un-select the "Refactor controls" check box at the bottom of the wizard.
This Merge Control Images can be launched from the Application Model view or by right clicking on the desired controls: right click on control(s) Manage -> Merge Control Images.
This can be used when you have one or more controls with static image content that will not change during runtime. It is sometimes more efficient to flatten those render extensions into a single static image. The controls must be in the same layer for the wizard to work correctly.