A new Storyboard project can be created in many different ways; as a new empty application, as a Photoshop™ import or as an import from an existing Storyboard Embedded Engine runtime.
In order to create an empty Storyboard application, select File > New > Storyboard Application from the main menu (when in the Storyboard perspective, otherwise select Project…).

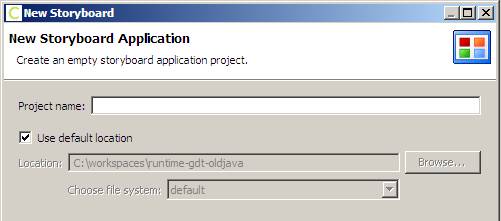
This will open up the New Storyboard Application wizard that prompts for the name to use for the Storyboard project. This name will also be used for the initial Storyboard application file.
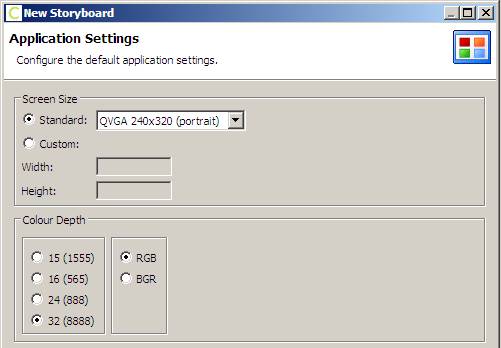
The next page of the wizard provides the ability to customize the initial application screen settings. The screen settings, once applied, will remain locked for the design period of the application.
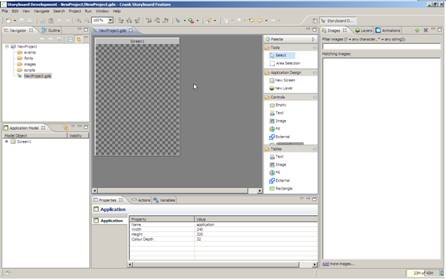
Selecting Finish will close the wizard, create the new project and automatically open the Storyboard editor on the project:
Often an excellent starting point for the application design is the graphics design that was used to do the initial preview of the application’s functionality. The Photoshop™ file import provides the ability to use these design files to jumpstart the application development process.
The import wizard is initiated through the File > Import main menu item. This will bring up the initial import dialog.
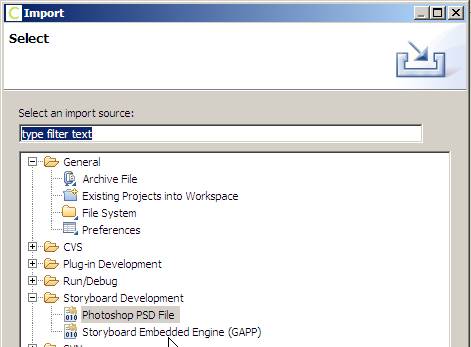
Selecting Photoshop PSD File and clicking Next will move to the next page that allows you to select the PSD file that you want to import from the local filesystem and allow you to either create a new Storyboard project (Into New Project) or to incorporate the imported content into an existing project (Into Existing Location).
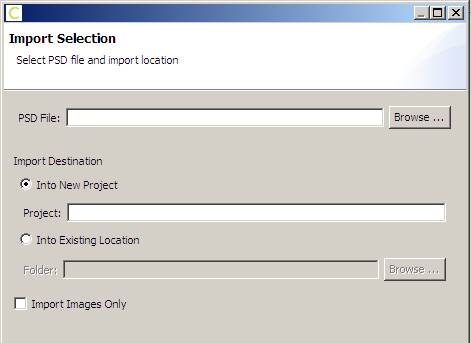
If a Storyboard application has already been created it is only the image contents of this PSD file that are wanted, then selecting the Import Images Only option will extract the images from the PSD file and place them in the images directory of the target project.
Once the Photoshop™ file is imported, then the application will be opened in the Storyboard editor. The layer information from the Photoshop™ file has been maintained, and the layers created as part of the model and will be displayed in the Layers view.
The first screen of the application will reflect the last visible state of the file when it was saved and will contain those layers that were visible during that editing session.
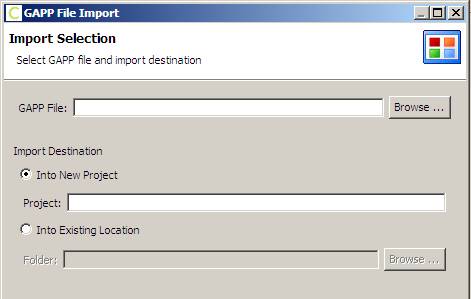
Storyboard Designer can also round trip export/import the files created as part of the Storyboard Embedded Engine, also known as ‘gapp files’ since they typically have a .gapp file extension. These files are imported in the same way as a Photoshop™ file, using the import wizard from the File > Import main menu

Selecting Storyboard Embedded Engine (GAPP) and Next will take you to the next page of the wizard allowing you to select the embedded engine file to be used for import.
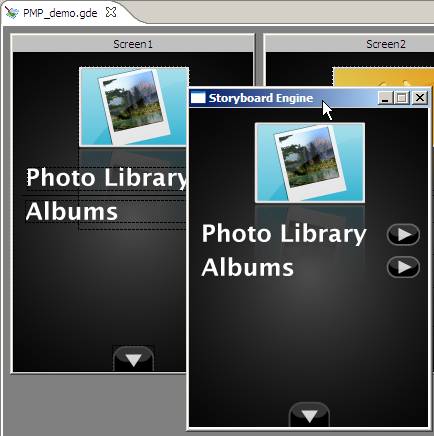
After an application has been created, it is a good idea to run it through the simulator to validate the runtime behaviour before exporting the application to a Storyboard Embedded Engine deployment file. The simulator is a host based instance of the Storyboard Embedded Engine and should exhibit the same operational behaviour as the target, though there may be differences in the level of performance obtained because of the different CPU and graphics characteristics.
Simulating a Storyboard application is a straightforward process. From the Navigator view you can right click on the Storyboard designer file (*.gde) and select the Storyboard Simulator option.
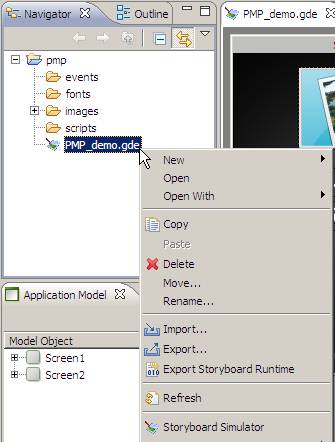
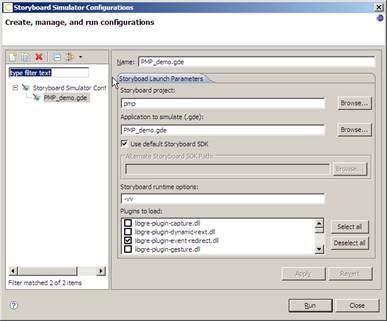
Alternatively you can select the Storyboard Simulator option from the toolbar or main menu and select Storyboard Simulator Configurations… which will allow you to customize how the simulator is launched.
The options include configuring which plug-in are to be loaded by the simulator and what level of verbosity should be used to run the simulator.
When the simulator is launched, then it will perform an automatic export to a Storyboard Embedded Engine to a temporary directory and run the application in its own window on the host system.
Exporting a Storyboard Embedded Engine configuration is initiated from the main menu as File > Export. This will bring up the export wizard.
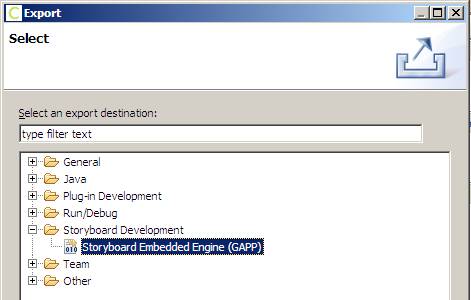
Selecting the Storyboard Embeded Engine (GAPP) option and clicking Next will bring up an export file selection dialog. Select the Storyboard application file (*.gde) that you want to export and the output location that you want to export to.
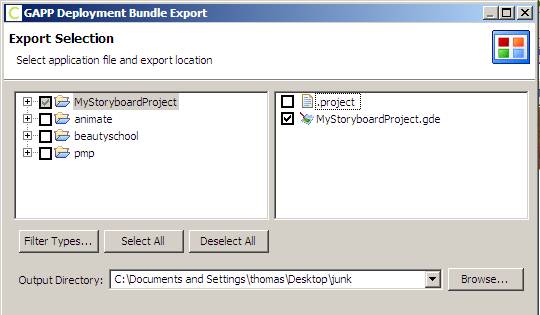
Selecting Finish at this point will create the specified directory and create a Storyboard Embedded Engine (*.gapp) runtime file and also export the resources from the images, fonts and scripts directories.
You can compare GDE files with those that are checked in to a revision control system or with another GDE file that is in your workspace. To compare two GDE files that are in your workspace, select both files, right-click and select "Compare With -> Each Other". To compare a GDE file with a revision that is in a repository, right-click on the file and select the menu entry "Compare With". In the sub-menu you can select "Latest from Repository" or "Revision" if you want to compare with a different version.
When you do the compare you will be presented with the following screen:
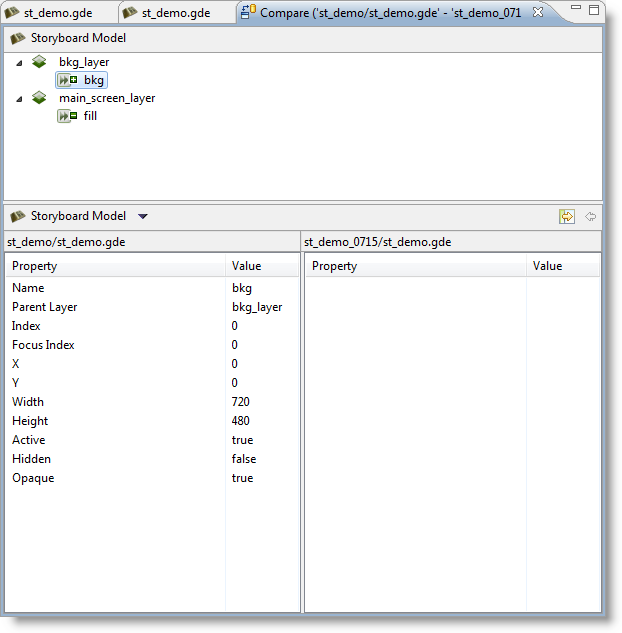
A graphical compare is also available for Screen, Layer and Control elements. You can view the graphical compare by clicking on the Storyboard Model drop down menu, which is above the properties comparison view, and selecting Graphical GDE model. After selecting the graphical compare, click on the Screen, Layer, or Control that you wish to view.