Working with Animations
There are a number of ways to get started creating animations. You can manually create a new animation from the Animation Timeline View and add the variables to the animation one-by-one, however Storyboard provides a few shortcuts to make this process easier.
Record Animation

To create new animations, Storyboard provides a mechanism that allows you to record a series of changes to your application and have those changes automatically incorporated into a new animation. This capability, Animation Recording, can be accessed from the top menu bar.
The animation recorder tracks all changes that are made to model objects in the application. When the recording is finished it automatically creates new variables for those static values that have changed. It then gathers all of the changed variables and places them into a new animation ready to replay that visual change.
While recording, you have the ability to take snapshots. Snapshots cause subsequent steps created by changes during the recording to be offset by the duration of the previous step. This way, you can create a sequence of consecutive animation steps rather than have them execute simultaneously. The snapshot action is located right next to the recording action, and will only be enabled if you are currently recording.
![[Note]](images/note_635484789.png) | Note |
|---|---|
When using the animation recorder, any structural changes made to the model will be automatically reverted and lost at the end of the recording. The model recording only tracks changes to existing model properties and variables, creating variables automatically for any static elements that change. This means that, if during the recording any controls, variables, actions, or any other model elements are created, they will not be captured in the recording and they will also not be present in the model when the recording is stopped. |
Add Animation

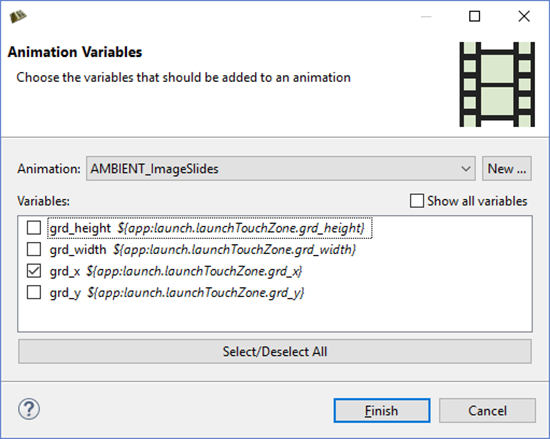
To quickly add new variables to either a new or existing animation, use the Animation Variable command that is available from the editor toolbar or from the right-click menu on many model objects.

A dialog displays all of the variables that are associated with the current selected object. You can quickly select the variables you are interested in, select the animation that you would like them to be applied to, and immediately start fine-tuning that animation.
Preview Animation

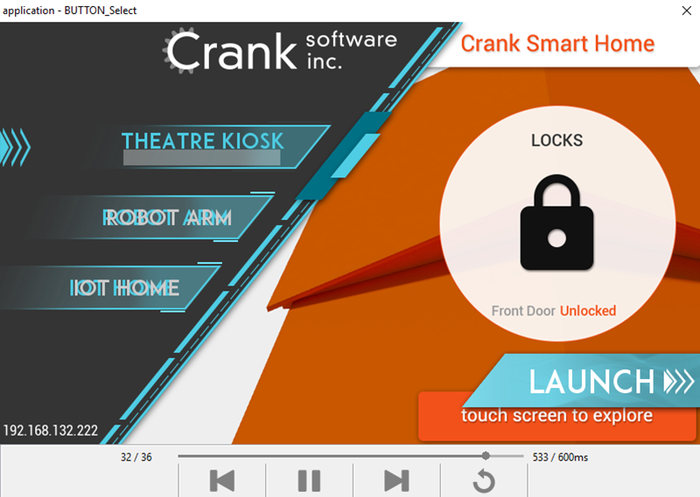
Preview the currently selected animation by clicking the animation preview action. An uneditable version of the application is displayed in a dialog and runs the animation. The bottom bar contains actions that control the preview. Play/Pause will stop and restart the animation from the current frame. While the preview is paused, use the Fast Forward/Rewind buttons to move ahead/back one frame at a time. Interact with the progress bar to jump to any frame and click on the Replay button to reset the animation to frame 0 in preparation for another run.

By default, the preview window chooses the screen to display by looking at the animated variables. However, if the user has selected a design context for the animation in the timeline, that context is used to determine the screen to display in the preview.