Using Variables to Create a Dynamic UI
Table of Contents
As outlined in the Storyboard Architecture chapter, Storyboard variables play an important role in making the presentation of a UI dynamic. Render extensions and actions have sets of properties, such as color, size, alignment, or name, that define their behavior or operation. By default, these properties contain fixed values that do not change from the values they are given at design time. This would nominally make for a static and fixed user interface and probably an unsatisfying user experiences. To give rendered content and executed actions dynamic behavior that can be modified when the application runs, these properties can be bound to variables.
Variables, like actions, are associated with a particular model element. The model element that they are associated with typically is an indication of the intended scope of use for that variable. For example if a variable is associated with a control, then it is likely only render extensions and actions local to that control that are going to be using that variable. If a variable is associated with the application or with a screen, then that implies a broader context of use for the variable. This is not a hard rule however since Storyboard allows references to variables using a fully qualified name as discussed in the Storyboard Architecture chapter.
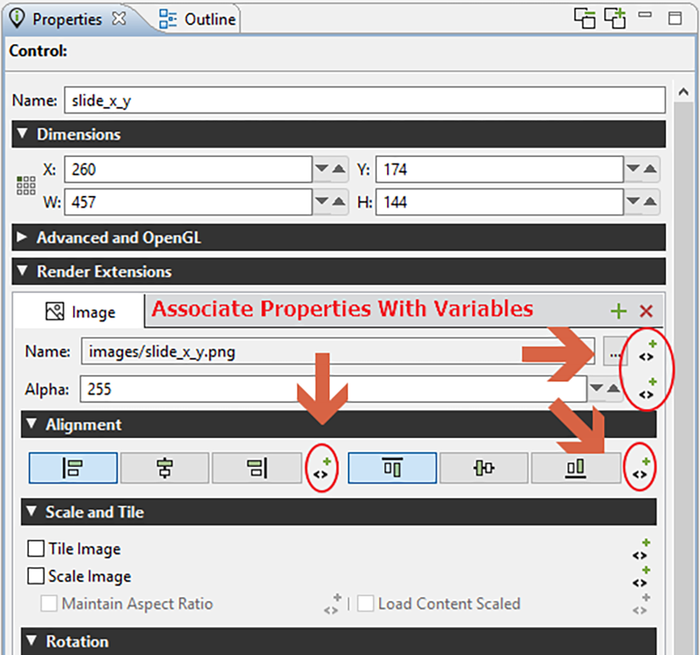
The preferred way of creating a variable is to create it at the point where the variable is going to be used, for example associated with particular render extension's property. Within the Design environment, you will know if a property can be made dynamic and bound to a variable by the presence of a next to the property name in the . Pressing on this icon will automatically open up the dialog prompting you to select an existing variable from the application model. If the variable you want to associated is not listed and you want to create a new variable, then this is easily accomplished from within this dialog by pressing on the button. This will then open the dialog allowing you the ability to create a new variable directly in place. The variable will be created and associated with the model element that you were looking at within the dialog and automatically selected for you.
The alternative way to create variables is to create them directly on the model objects that they will be associated with through the or the using the > functionality which will open up the dialog. This method is more direct, but more prone to error because you will be asked to provide a type association for the variable. When variables are selected, and created, through a particular property the type information is passed along and used as a filter so that the subsequent dialogs will only allow you to select or create variables that match the type of the property you want to bind to.
You can identify that a variable has been bound to a render extension or action property
by the change in presentation of that property in the . Properties
that have not been bounds will simply show the name of the property and it's current value. Properties
that have been bound to a variable will have an additional annotation indicating the variable that
has been associated in the form of ${...:variable_name}. This annotation will show in
green if the variable has been resolved in the Design environment and will show in red if the variable
can not be resolved.
To change the variable binding to a new or different variable, then just repeat the process of clicking on the to re-open the dialog. To remove a variable binding on a property you can right click on the and then select . This will remove the binding but will not remove the variable definition. To remove the variable definition, delete the variable from the or from the
Once a variable is created and associated with a property, any change in that variables value will cause the Storyboard Engine to automatically schedule a redraw operation of any elements that might be affected by the change. Variables can be bound to multiple properties at the same time. In fact this is a common Storyboard design pattern to create styles within the application for shared behavior that you want to treat in a uniform manner. An example of such a use would be the definition of application variables for font names and font sizes or a set of translation text values that should be used commonly throughout the application. During design, the value of the variable can be changed either directly when adjusting a property that has been bound to a variable by changing the value in the or by making a change directly in the . When the value of a variable changes in the Design environment the change will propagate through to all clients who are referencing that variable in a similar manner to what happens when the value of a variable is changed at runtime.
Variables are generally manipulated directly in one of two ways; via a DataChange Action or as part of a Lua callback function in a Lua Action. The DataChange Action's is a simple action that allows one or more variables to have their value set to a new value. The new value can be fixed or it can also be the value of another variable extracted at runtime. It is ideal for scenarios where there is no additional computation or logic required, simply a new value has to be assigned to a variable. If more sophistication is required, then the the section called “Storyboard Lua API” provides a comprehensive API for reading and writing variables defined as part of the Storyboard model and offers a rich set of conditional logic and IO facilities that can be used to guide the setting of variable values. The Animation Action provides a common third way of manipulating variables and that mechanism is covered in detail in the Creating and Applying Animations chapter of this guide.