Translating a Storyboard Application
Many user interfaces do not start out with translation as a primary concern. Translation and internationalization of a UI is frequently an activity that occurs after the main user experience issues have been addressed and a workflow established in a primary language.
When the Text Translation view is opened and no translation database has been associated with the project, then what you will see will be an empty view prompting for a translation database to be created:

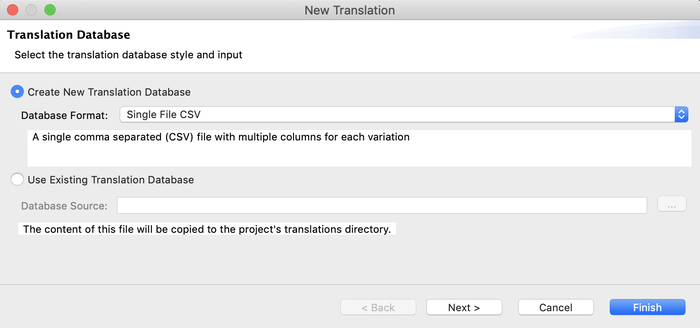
To get started translating your application, create a binding to a translation database where the text strings for the application in the default language can be stored along with any additional attributes that need to be considered as part of the internationalization effort for this application. Create this binding by selecting Create Translation Database which will open a New Translationwizard:

Currently Storyboard Designer only has the ability to interface with comma separated value (CSV) multi-column language files. In these files, commonly used by translators in programs such as Excel, a single column contains a unique identifier, then subsequent columns contain the different language values for that identifier. For example:
ID,English,French,Spanish
1,Hello,Bonjour,Hola
If a translation database such as this is already available, then you can select it in this dialog, otherwise a new one will be created for you. These files contain the text string information used for different text values in different languages. It is frequently necessary to also change non-text attributes that are Storyboard specific so these attributes are maintained in a separate database file using the same organization but instead of unique identifiers the fully qualified path to the Storyboard variable that should be changed is used instead:
ID,English,French,Spanish
Layer.Control.grd_width,192,310,192
These files are stored in the translations directory of the project with the name(s) that you have provided.
Once a translation database is established, then the first thing to do is to run an analysis of the current user interface and to establish translation mappings for the text content that is present in the default language of the application. This can be done on a field by field basis using the entries in the Text References tab or a full analysis can be performed using the Extra Text option. The Extract Text button in the Text Translation view scans the all text field references and presents a dialog that allows the user to select and approve the automatically identified translations and to create new text translations for fields that do not already have a translation entry. This tool significantly helps bootstrap the translation process.
After this bootstrapping, the translation database file (default translations/translations.csv) can
be provided to text translators or linguists to populate with new language entries. For more details on the best practices
for editing these files to create UTF-8 encoded text strings, refer to the next section Creating
and Editing Translation Content CSV Files. If the translation database
file is replaced in the project and the project re-opened, then the new language values will automatically become available for use.