Table of Contents
Custom imagery enhances the presentation of a rich user interface. A significant portion of a Storyboard application's user interface objects are made up of custom visual elements. The Designer environment works hard to ensure that the management and use of those images is as flexible as possible.
Images are applied to a UI design using the image render extension. The image render extension
uses its name property to identify an image file (png, jpg, bmp
among others) that is to be rendered when the control is redrawn. The name of this image
file is generally relative to the project root and by convention is located in the
images directory of the project. Like all properties, the name
field can be bound to a variable in order to make it dynamic and changeable at runtime. The
> > and
(among many others) demonstrate how images and
image properties can be manipulated to provide different visual effects.
Any image content that is directly in the images directory of a project will be loaded
into image selection dialogs and made readily available to the user. Since the images directory
is part of the filesystem, it is relatively straightforward to add content into it, however Storyboard also provides
some import facilities directly within the Designer environment:
Directly placing images into your project’s
imagesdirectory. This can be done using copy and paste, drag and drop directly to the underlying filesystem folder or into the folder within the Designer environment.An image may be dragged and dropped from your filesystem directly into the application editor. When this happens the image will automatically be copied into the
imagesdirectory and then a new control and image render extension will be created where you dropped the image.The has functionality to import images using a toolbar icon. Multiple images may be imported at a time.
The . This is the dialog associated with the Name property of the image render extension. By default this dialog will show you the currently available images, but if you need to bring in a new image then there is an import button within the dialog.
The dialog is presented when creating a new image control or when we are selecting to change the Name property of an image render extension. The primary difference between creating a new image control and changing the name property on an existing image render extension is that only newly created image controls will have the option to Resize the control to the image dimensions. This option allows you to drag out an area for a control but then properly fit the control to match the size of an image.
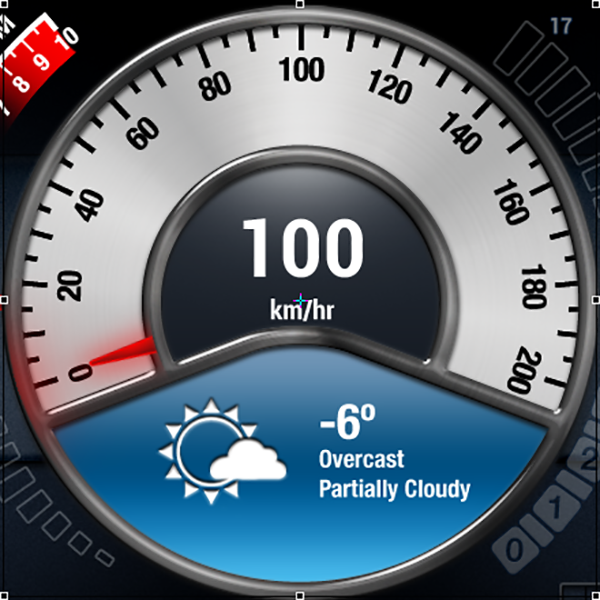
Storyboard image render extensions have an option to facilitate the rotation of an image at the center of the image. For images that are not scaled, this option behaves exactly as one might expect it would and as the rotation property is changed the image rotates accordingly.
When an image is scaled and there is need to rotate it the rotate at center provides an automatic scaling facility that may not be what you are expecting. In these situations the selection of rotating at center or selecting a custom rotation co-ordinate and making it the center of the image will provide different results.
In all situations, the option to rotate at center works best with the image render extension alignment configured center-center as such:
 |
The rotate at center option uses a specific transformation path that will scale the image to fit the original size of the render extension after the rotation has taken place, this means that as it is rotated, it will be scaled to fit into its original bounds.

The option to use custom rotation points works well with scaled images. The image will be scaled to fit its render extension bounds before being rotated and the image rotation will be performed without modifying the size of the image on screen.

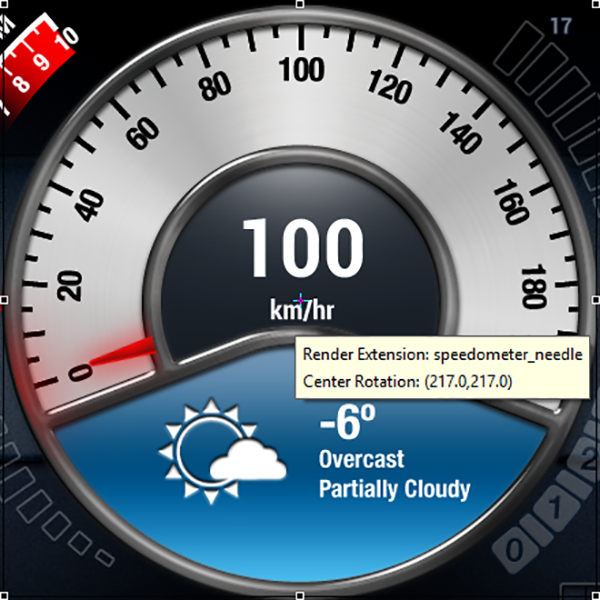
In order to see the visual representation of the custom rotation point in Storyboard Designer, a render extension must have 'Rotate around center of control' disabled and must either have a non-zero rotation angle or must have a variable bound to the rotation property of the render extension. Hovering the mouse cursor over the crosshair will display the name of the render extension and the position of the rotation center point. Changes made to the rotation center x and y in the Properties View will be reflected by the crosshair in the editor.
Clicking on a control with a visible center rotation point crosshair will enter the control into direct edit mode. Upon entering this mode, the center rotation point crosshair will change to indicate that it is in direct edit mode and the mouse cursor will change to indicate that the point can be dragged. Direct edit mode allows you to drag the center rotation point crosshair within the bounds of the control, the center rotation x and y properties will be updated to reflect changes to the crosshair position. When multiple image render extensions which are rotated at custom points exist on the same control, only the topmost render extension's crosshair will become active in direct edit mode.
When images are rotated dynamically at runtime, there is rarely a
one-to-one correspondence between the original source pixels and the destination
pixels so some level of interpolation, or mapping, is going to occur. There are many
different algorithms for this interpolation each of which trades visual image
quality for the cost of the computation to perform the interpolation. This trade off
can be adjusted globally by configuring the quality render manager option for
sbengine, with Storyboard defaulting to a higher
visual quality mid-CPU cost option. On OpenGL based rendering platforms, another
option that can have an equally significant impact on the visual quality of rotated
images is the multisample render
manager option which controls how the edges of image textures are blended
with one another. Higher multisampling means smoother edges and lower multisampling
results in more jagged edges.