Table of Contents
Storyboard Suite’s collaborative features help multiple users develop applications faster. You can merge multiple files (*.gde) together and produce a single output during runtime. This tutorial explains how to create a project with multiple application files.
A project with multiple application files starts the same as a single application file project. Select > > or create a new project using the Photoshop Import feature.
A project can accommodate multiple stand-alone applications that share project images and script resources. You can add an additional application file to an existing project in multiple ways:
Create a new file within an existing project by selecting > > and choose to create a New Model in Existing Project
Create a new file using the Photoshop Import feature and select the option to import .psd Into an Existing Project as a New File.
In the navigator view select and copy an existing application, then paste and rename the copied application file.
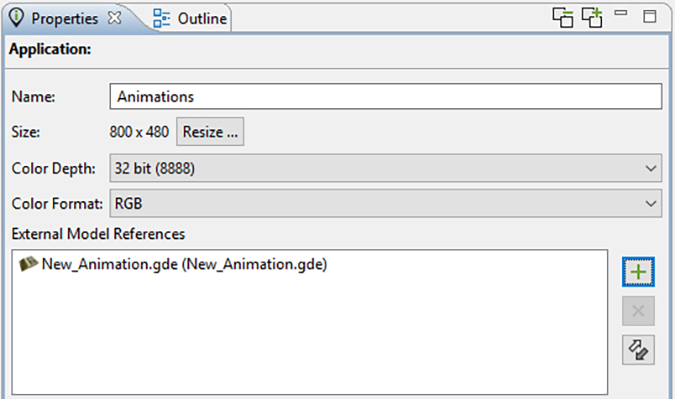
For a multiple application project to function as a whole, application files need to reference one another. Select the application from the Application Model View and in the Properties View, select Add external model resource button. In the next dialog select the .gde file that was created in Step 2 and press OK.
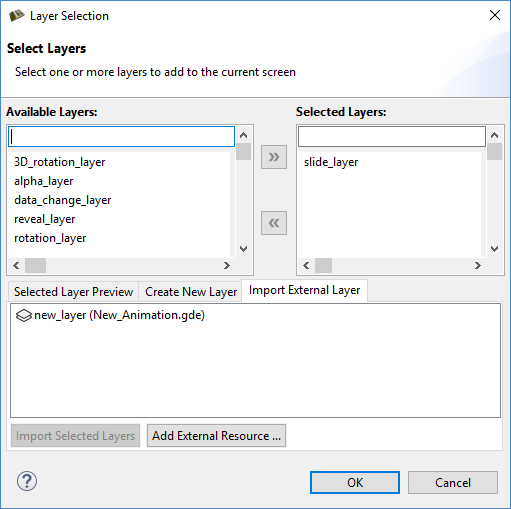
To add layers from an external model to a local application:
Select the Import External Layer tab and then select Import Selected Layers.
Choose the layer(s) to add to the current screen. After adding an external layer, Storyboard Suite will recognize the external content and incorporate it to function like any other layer.
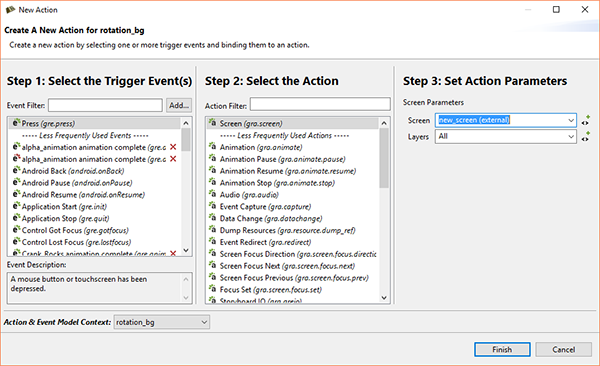
To create a transition from a source application screen to an external application screen, add actions to an application that perform a screen change.
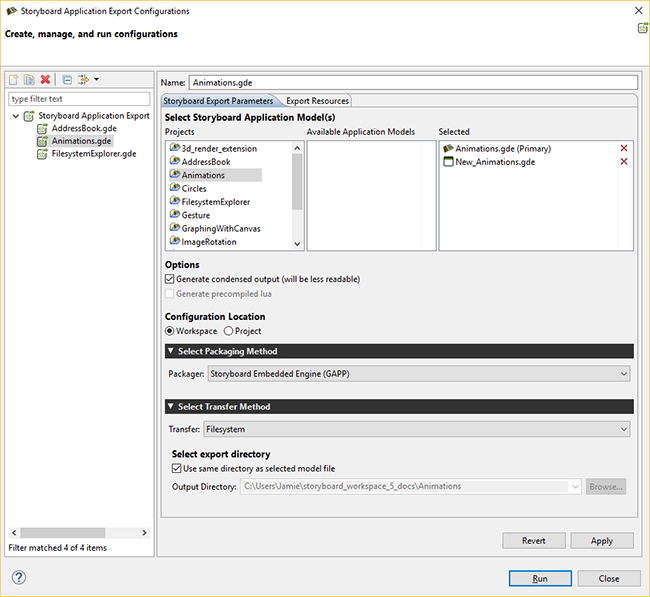
Before launching a multi-file application with the simulator, the external .gde files have to be referenced in the Simulator Configurations dialog.
To manage the runtime configurations, select > . A list of available models that can be included in the runtime export used with Storyboard Engine is in the selected project folder. To apply changes, select and then .
If no conflicts occur within the selected applications, they are merged and converted into a single unified application at runtime. If conflicts exist, they must be resolved before the application can merge.