A new Storyboard project can be created in many different ways; as a new application, as a Photoshop™ import, or as an import from an existing Storyboard Embedded Engine (GAPP) deployment file.
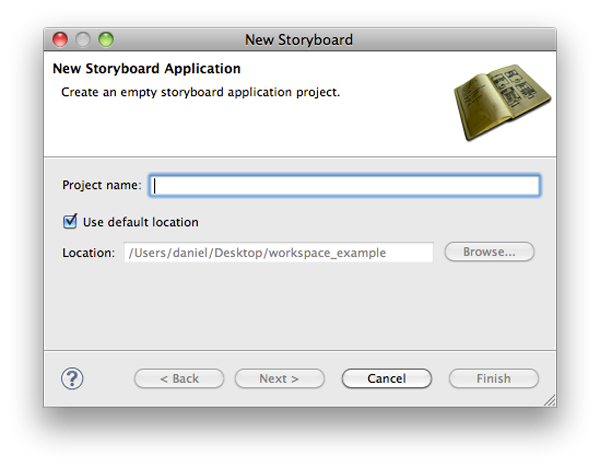
In order to create an empty Storyboard application, select File > New > Storyboard Application from the main menu (when in the Storyboard perspective, otherwise select Project…).

This will open up the New Storyboard Application wizard that prompts for the name to use for the Storyboard project. This name will also be used for the initial Storyboard application file.
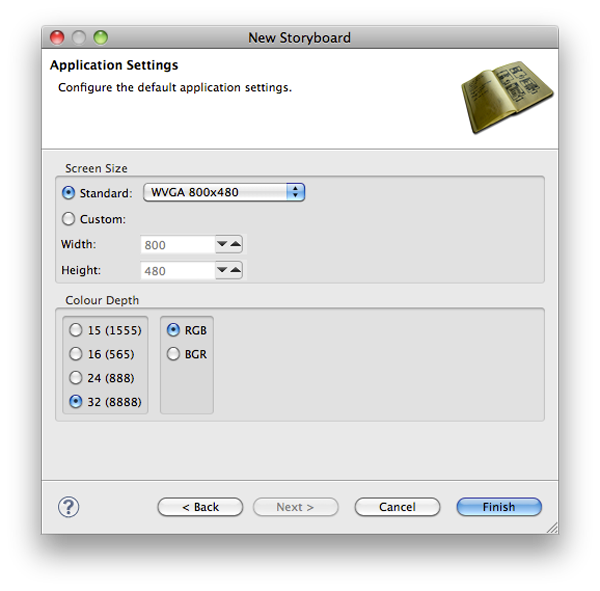
The next page of the wizard provides the ability to customize the initial application screen settings. The screen settings, once applied, will remain locked for the design period of the application.
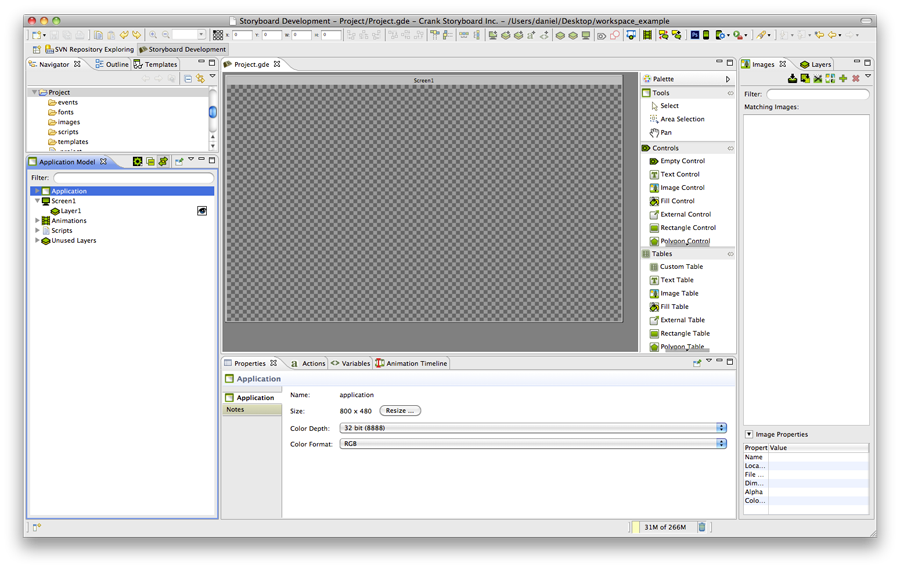
Selecting Finish will close the wizard, create the new project and automatically open the Storyboard editor on the project:
Often an excellent starting point for the application design is the graphics design that was used to do the initial preview of the application’s functionality. The Photoshop™ file import provides the ability to use these design files to jumpstart the application development process.
The import wizard is initiated through the File > Import main menu item. This will bring up the initial import dialog.
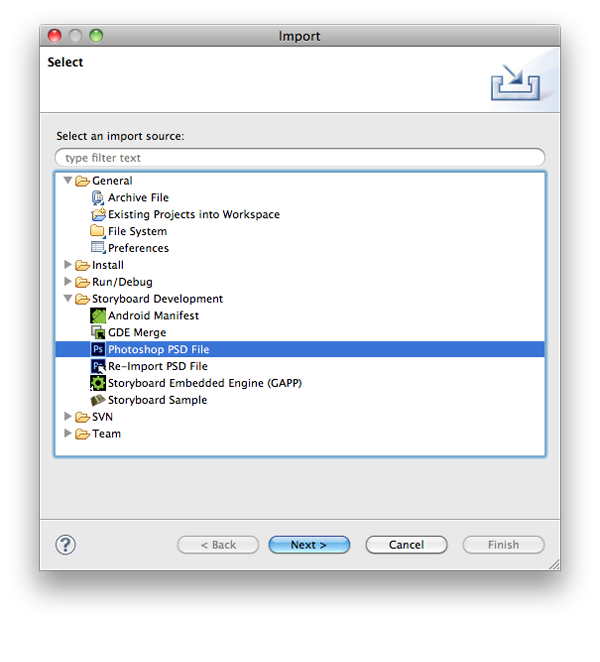
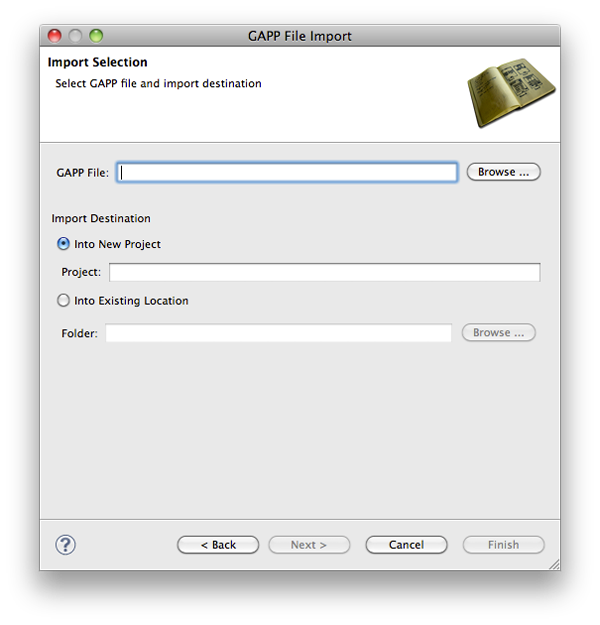
Selecting Photoshop PSD File and clicking Next will move to the next page that allows you to select the PSD file that you want to import from the local filesystem and allow you to either create a new Storyboard project (Into New Project) or to incorporate the imported content into an existing project (Into Existing Location).
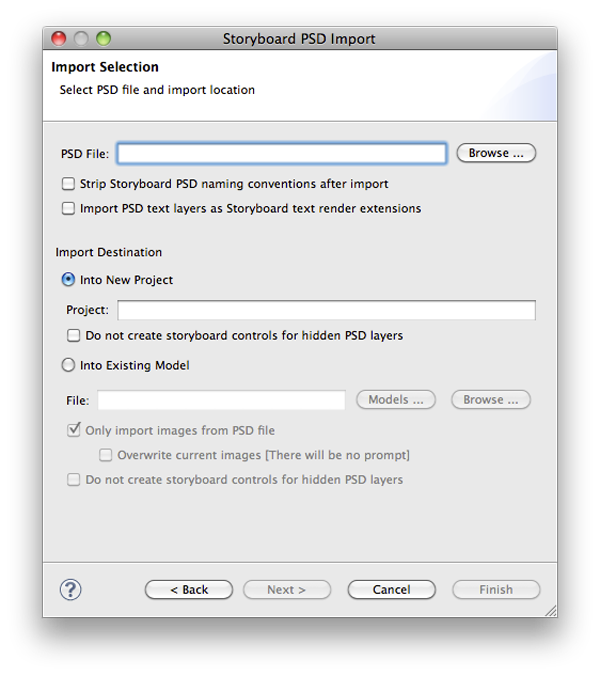
Select whether to import in to an existing project or in to a new project. You can control how the PSD import is executed by changing the PSD import options.
Once the Photoshop™ file is imported the application opens in the Storyboard editor. The layer information from the Photoshop™ file is maintained, and the layers created as part of the model are displayed in the Layers view.
The screen with the name of the PSD file that is now a part of the application reflects the last visible state of the file when it was saved and contains those layers that were visible during that editing session.
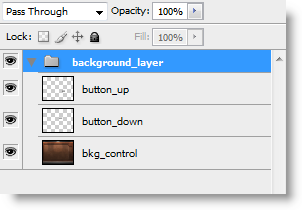
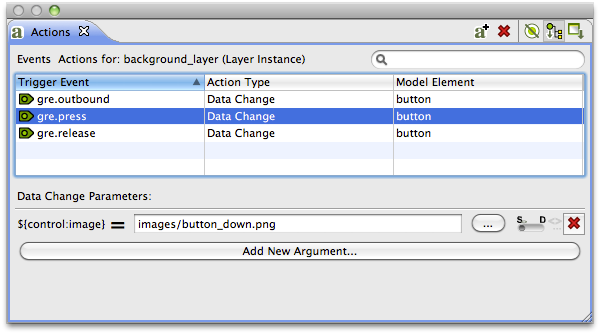
You can also control how the importer will import elements from the PSD file to your project by following a naming convention in your PSD file. If you end the name of a PSD layer group with "_layer" this will cause all groups and layers beneath it to be added to a layer with that name. If you name a PSD layer group with a name ending with "_control" this will create a new control with all layers in the group as image render extensions. Also, if you name a PSD layer with a name that ends with "_up" and a then have a layer with the same name only ending in "_down" immediately following it, this will create a control that will act as a button. It will have an action for press and an action for release and outbound that will switch the image render extension in the control between the up and down images.
The following image demonstrates how to structure your Photoshop psd file to get a layer with a background image control and a button with actions associated with it to change the image when pressed.
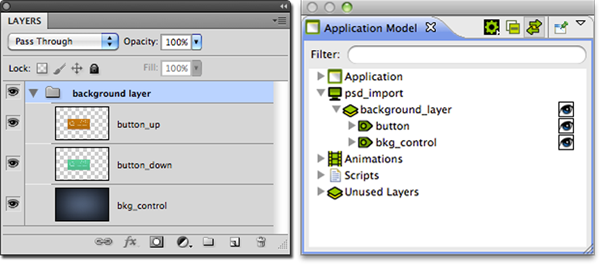
Below is how the new project is laid out after the psd file has been imported into Storyboard.
Using the proper naming conventions, in Photoshop for the button images, have created actions and variables for the button control automatically.
Storyboard Designer can also round-trip export/import the files created as part of the Storyboard Embedded Engine, also known as ‘gapp files’ since they typically have a .gapp file extension. These files are imported in the same way as a Photoshop™ file, using the import wizard from the File > Import main menu
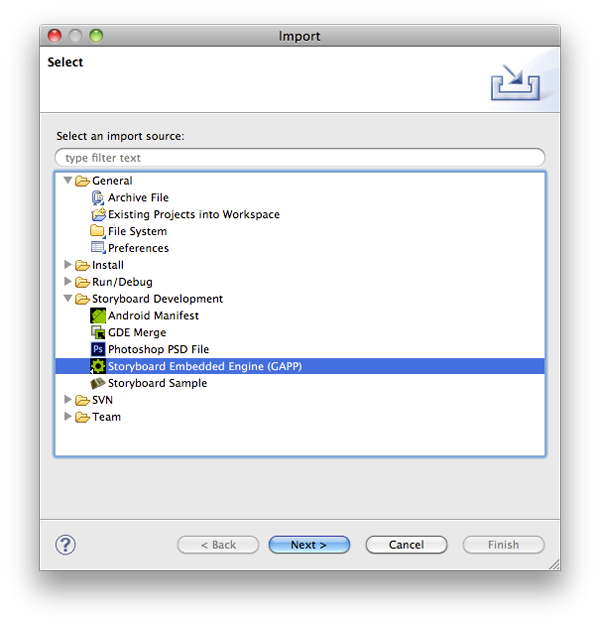
Selecting Storyboard Embedded Engine (GAPP) and Next takes you to the next page of the wizard allowing you to select the embedded engine file to be used for import.
Occasionally it may be convenient to share an existing project from one workspace to another. If the project is archived or its directory structure completely copied to a new location then it is possible to import the Storyboard Designer project as an existing project.
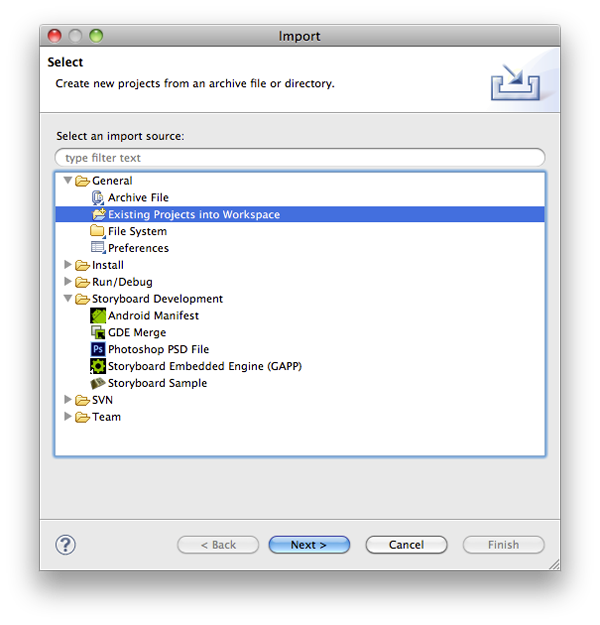
Selecting File > Import > General > Existing Projects into Workspace will launch the above import wizard. Selecting either the archive file or the project directory results in the Projects list being populated with all detected projects. Selecting one or more of the projects to import and then selecting Finish causes a new project to be created in the workspace.
Project names must be unique. If you are tyring to import an existing project into the workspace, then it is required that the colliding project names be temporarily renamed so that there are no name collisions in the workspace.