The Storyboard Designer editor is the central location for all design activities for your application. It provides a visual representation of all of the screens of the application and allows designers to edit the screen content and get immediate feedback about the look and feel of the application.
The default editing mode is to display and edit the entire application, showing all screens and their composited layers together.
If, instead of looking at all of the screens of an application together, you want to focus on editing and working with one particular screen, you can right-click in the editor and select > , which opens up a new editor window with that screen's content shown.
If you want to edit the layer contents only, independent of the screens to which they are bound, you can right-click in the editor and select > which opens up a new editor with all of the selected layers shown individually. If changes are made to a layer in this mode, the change will be reflected in all of the screens that reference the changed layer.
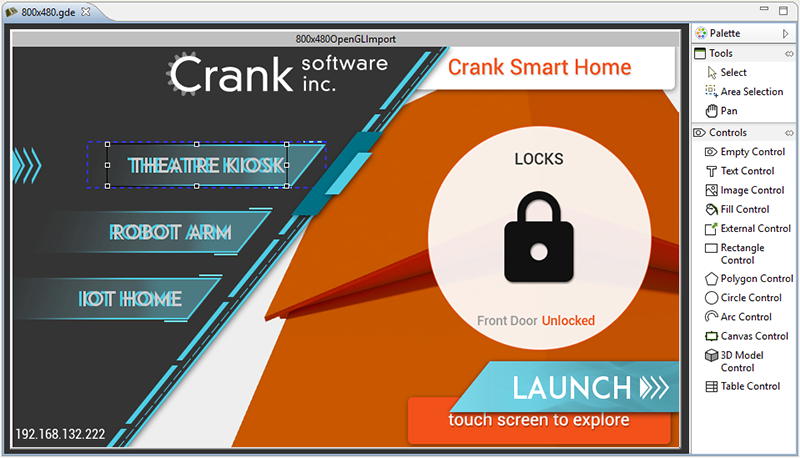
The right-hand side the editor contains a fly-out palette toolbar that provides the basic visual design elements for the application; screens, layers, and controls. These can be selected and dropped onto the editor to start building up the application.
Additional editing functionality is available through the right-click menu while in the editor, as well as from the main menu. This is where you will find functions to manipulate control size, alignment, and z-order/front-back placement, as well as the creation of new controls, layers, and screens.
Content can be moved within its container by selecting one or more items and then using the arrow keys to move the item. By default, the movement is in 10 pixel increments when using the keyboard, but if the SHIFT key is held down while using the arrows the content will move one pixel at a time in the desired direction.
There are a number of keyboard shortcuts for common operations these can be displayed on-screen by selecting > from the main menu.

In addition to the editing options available right click menu, the toolbar provides functionality that is context sensitive to the editor being used. When a Designer file is being edited (and the editor area has focus) the toolbar provides short cuts to several common operations.
- Storyboard Simulator
-
This will export the Designer file being edited to a Storyboard Engine file and simulates it using the host based Storyboard Engine configuration.
- Zoom Display
-
This controls the current zoom level of the display. This value can also be adjusted by CTRL+MouseScroll or COMMAND+Scroll using a wheel mouse or touchpad.
- Align and Resize
-
These toolbar actions provide a convenient alternative to manual alignment by aligning the selected controls automatically with one another. When a single control is selected the alignment is performed relative to the screen. When multiple controls are selected, the alignment is performed relative to each other.
- New Model Elements
-
These toolbar actions provide an alternative to the palette for the quick construction of screens, layers and controls.
- Control Outline
-
These toolbar actions control how the control content is displayed within the editing environment. By enabling the control outline, a border will be drawn around controls and layers. By enabling the wireframe mode, no control content will be drawn, but an outline of the controls is drawn. These modes can be used to optimize the application layout to avoid unnecessary damage and redraw operations.
- Wireframe
-
The wireframe mode turns off all of the render extension drawing within the controls and shows only an outline of the controls, layers, and screens similar to what is provided by the Control Outline functionality.
This functionality is useful to minimize the amount of control overlap that occurs so as to prevent excessive redraw damage areas.
In addition to the standard model editing functionality, some render extensions have direct edit functionality. To enable the direct edit on a control with one of these render extensions, the user needs to do a slow double click on the control.
- 3D Model
-
When the direct edit mode is activated, a set of xyz axes will appear in the bottom left corner of the control. At that point the user can use their mouse to move the model. Holding the shift key allows the user to rotate the model using their mouse. As well, holding either the x, y, or z key isolates that axis when either translating or rotating the model. When the user is finished editing the model, they just need to click anywhere outside of the control to end the direct edit.
- 2D Polygon Editing
-
When direct edit is activated, the user can create and edit a polygon on the screen using hotkey toggles. Hold 'shift' and click within the control bounds to create new vertices (ideally, 3 vertices are needed to have a sufficiently visible polygon). Hold 'control' and click on a particular vertex to delete it from the polygon. Hold 'alt + shift' and click near an edge to create a new vertex splitting that particular edge. Vertices can be moved by simple click and drag. Exit quick edit by moving mouse out of the control bounds.